aurazoe_nanoleaf_lines_banner_01

Create Your Own Masterpiece


Products

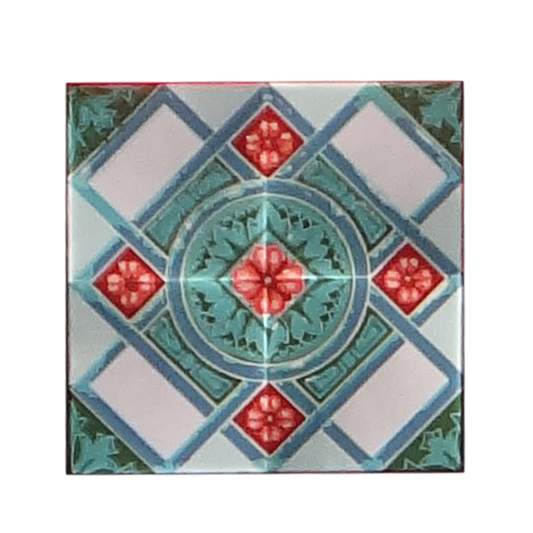
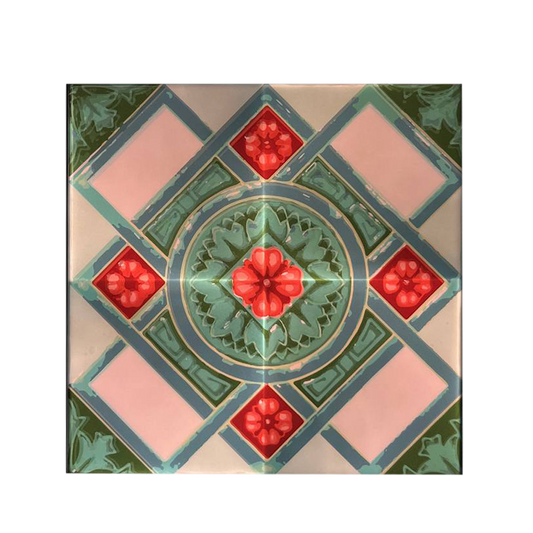
Peony Tile (Squares)

$9.00 SGD

Key Features

Customisable Layouts
Square panels connect on all four sides for endless design possibilities. Staggered Linker Slots allow you to arrange your Canvas squares side by side or in an offset position, giving even more versatility for totally unique creations!
Music Visualiser
Transforms your favourite songs into bright and colourful light shows.
Touch Control
Control your lights with swipes and taps right on the panels themselves. Turn on and off, adjust the brightness, and change Scenes, without ever pulling out the app.
Screen Mirror
The colours from your screen are reflected on your panels for an immersive experience.
Touch Control
Control the lights or play Touch Games. Try Touch Actions to activate HomeKit devices.
16 Million Colours
You choose — crisp functional lighting or beautiful ambience with dynamic colour Scenes.
Simple Setup
Drill-free installation with the included double-sided Mounting Tape.
Reacts to Touch & Music
With the Rhythm feature watch your light squares react to any music or sound.

Perfect For Any Room

Frequently Asked Questions

Setting up my Nanoleaf Canvas on iOS

TIP: Lay out the design for your Canvas squares on the floor (or another flat surface) to ensure that each square is properly connected to a linker.

Arrange the Canvas squares such that each is able to connect to at least one adjacent square. Use the Layout Assistant to verify the layout and map out where to place your squares.

Ensure that at least one power supply is used per every 25 squares. Press the power button, and the Canvas will power up within a minute or two.

Once the Canvas has powered up, and is cycling through colors, you can start the pairing process. This will be further indicated by the light on the power button remaining on. Please note that the light on the Control Square will begin to flash after 15 min after which you would need to perform another soft reset.

Start by press Start Pairing button in the app. The Add Accessory window will appear to scan the HomeKit Setup Code (QR code). This code can be found on the cover of the user guide booklet. Alternatively, the panels can be paired through NFC pairing

Note: NFC will need to be activated on your mobile device in order to use this feature.  

Scan (or manually enter) the HomeKit Setup Code (QR code). The app will begin searching for the accessory to add.  When the pairing is complete the Canvas squares will flash green. Then, the panels will flash white to indicate that they have been identified by the app.

The Add Accessory window will pop up to accommodate renaming the device. Here, you can also assign the device to a specific room, as well as choose to include it in the list of Favourites in HomeKit.

The Setup Orientation screen will appear in order to confirm the orientation of the installation with what is displayed on the screen. 

Note: This is required to enable proper scene direction, and ensure that touch and swipe gestures work properly.

Setting Up My Nanoleaf Canvas on Android

TIP: Lay out the design for your Canvas panels on the floor or table to ensure that each square is properly connected to a linker.

Upon opening the Nanoleaf Smarter Series App for the first time, you will be prompted to create an account. This is used to connect to other applications like Amazon Alexa, Google Assistant and IFTTT. Check out our integrations page for more information on this.

Arrange the Canvas squares such that each is able to connect to at least one adjacent square. Use the Layout Assistant to verify the layout and map out where to place your squares.

Ensure that at least one power supply is used per every 25 squares.

Once the Canvas is cycling through colours, the power button LED will remain on and steady - this indicates that the Canvas is ready to be paired to your mobile device. Please note that the light on the Control Square will begin to flash after 15 min after which you would need to perform another soft reset.

Start by pressing the Start Pairing button in the app. Select the network that you want to connect the Canvas to (Note: this must be a 2.4GHz network). Once it is connected to the network, the squares will flash green to indicate that they were able to successfully join.

Following this, you will be prompted to input the pairing code. This code can be found on the cover of the user guide booklet or on the back of the Control Square. Alternatively, the squares can be paired through NFC pairing

Note: NFC needs to be activated on your mobile device in order to use this feature.

The Add Accessory window will pop up to accommodate renaming the device. Here, you can also assign it to a specific room.

The Setup Orientation screen will appear in order to confirm the orientation of the installation with what is displayed on the screen.

 Note: This is required to enable proper scene direction, and ensure that touch and swipe gestures work properly.
Pairing the Nanoleaf Canvas

Once your squares are connected to the WiFi network (see the articles for setting up on iOS and Android for more details), a pairing sequence is required to complete the setup.

Note: please ensure you're on version 3.0.3 or higher of the Nanoleaf App.

Some phones are also NFC compatible. NFC stands for Near Field Communication. Essentially, it's a way for your smartphone or tablet to interact with something in very close proximity to it. It operates within a radius of about 4cm and provides a wireless connection between your device and another.

If you are an Android user, please do the following:

If your Android device is NFC compatible

Ensure that NFC is enabled on your mobile device and that the power supply is plugged into the wall and connected to your Nanoleaf Canvas. When on the pairing screen, hold your mobile device near the Control Square and slowly move it across the surface until the Nanoleaf App proceeds to the next step of the setup.

If your Android device is not NFC compatible

Manually enter the pairing code found on the front cover of your quick start guide or on the back of the Canvas Control Square. The pairing code is eight characters long in the format XXXX-XXXX.

If you're an IOS user: 

You can scan the QR code on the front of the booklet that came with your smarter kit or Canvas Control Square. Hold the camera over the QR code, positioning it within the white outlined box that appears on the screen.

If your iOS device is NFC compatible and you've lost the QR code

Ensure that NFC is enabled on your mobile device and that the power supply is plugged into the wall and connected to your Nanoleaf Canvas. When on the pairing screen, hold your mobile device near the Control Square and slowly move it across the surface until the Nanoleaf App proceeds to the next step of the setup.

If your iOS device is not NFC compatible

Manually enter the pairing code found on the front cover of your quick start guide or on the back of the Canvas Control Square. The pairing code is eight characters long in the format XXXX-XXXX.

How Do I Reset My Nanoleaf Canvas?

Your Nanoleaf Canvas can only be connected to one WiFi network at a time. The following steps will reset your Canvas so they can be configured onto a new network or reset to factory settings.

Soft Reset: This will reset WiFi and all pairing information for your Canvas, but will keep your saved scenes.

  1. Make sure that your Canvas is plugged in to the wall outlet and has booted up (during bootup, all squares are white).
  2. Press and hold the Power and Dim buttons for 10 seconds. The button LEDs on the control square will start flashing rapidly.
  3. Release the two buttons, and after a few moments the Power button LED will remain on and steady.
  4. Delete the previous device from the app and proceed through setup by adding this Canvas as a new device.

Hard Reset: This will reset your Canvas to factory settings, deleting all WiFi settings and pairing data. Default scenes will be restored from the device memory. The Two-Way Sync feature can be used to back up and restore any custom Scenes that you've created. See below.

To perform a Hard Reset:

  1. Disconnect the system from power (unplug from the wall or the square).
  2. While holding the Power and Dim buttons, plug the power supply back into power (or the squares).
  3. Continue holding the buttons down until the button LEDs on the Control Square light up.
  4. Once the button LEDs come on, release the buttons. The button LEDs will flash to indicate that a hard reset will now take place.
  5. The Control Square will reset to factory defaults and boot up.
  6. The Canvas is ready to be set up once the Power Button LED stops flashing and the squares begin cycling through different colours.

Backups with Two-Way Sync

If Two-Way Sync is active for your system, your Nanoleaf Cloud account will back up and restore Scenes that you've created in the event of a Hard Reset.

To use Two-Way Sync, ensure that:

  • You're running Nanoleaf App v3.4.0+ and Canvas Firmware 1.3.0+
  • You have a Nanoleaf Cloud account and are logged in via the Nanoleaf App
  • The Cloud Sync option is toggled on (Settings >> Cloud Sync)
  • The Device Sync option is toggled on (Device Settings >> Device Sync)

How do I use Touch and Touch Gestures with My Nanoleaf Canvas?

Your Nanoleaf Canvas Light Squares are touch-sensitive, bringing a whole new dimension to the Nanoleaf experience!

There are two different ways to interact with the Canvas using touch.

Touch
On all Canvas scenes, you can interact via touch. For example the touched square will send a ripple out. These features depend on the scene and are a feature of each scene.

Touch Gestures
These are not scene specific, but can be used to perform system controls like brightness, changing scenes or turning your Canvas on and off. 

What do the LEDs on the Canvas Control Square Indicate?

On the Canvas Control Square, each button has an LED which backlights it. The table below shows what these LED indicators mean

LED Sequence Duration Indicator Meaning
Power LED On (White) Always The Canvas has not been setup onto a Wifi network. Once the Canvas has been configured to a Wifi network, this LED will turn off
Power LED Off Always Canvas has been configured to the Wifi network
Power LED Flashing 4s On, 4s Off

The Canvas was configured to a Wifi network, but can no longer find that network. Usually this status occurs when the network settings have been changed (SSID or password) or the router has changed.

To resolve, perform a soft reset, delete the device from the app and setup again.

Scroll Left/Right Until firmware has been updated The Canvas is downloading/updating the firmware and booting up after the firmware, respectively
Power LED Flash (GREEN) 0.1s On, 0.1s Off  Nanoleaf Remote Paired successfully. Check out the article on how to pair your Canvas to Remote for more details
Rhythm LED On Always Rhythm active and listening for sound data
Power LED Magenta  1 s Remote message received by the Canvas
Wanyu Bradley

Can I use the Canvas Outside?

It is not recommended to use the Canvas in an outdoor setting.

This is because the Canvas is not rated for inclement weather conditions like rain and snow.

Wanyu Bradley

Can I use the Canvas Outside?

It is not recommended to use the Canvas in an outdoor setting.

This is because the Canvas is not rated for inclement weather conditions like rain and snow.

Wanyu Bradley

Troubleshooting: Android App Errors

When using your Android device you might come across the following Android errors:

Error 01 or 04

This is usually an error related to setup where the phone is unable to connect to the Canvas and then back to the Wifi network. To resolve, try the following:

  • Powering your phone off and turning it on as this should clear the data.
  • Power cycling the Canvas - remove the power supply(s) from the setup or wall and plug in
  • Turning off the Bluetooth as this sometimes interferes with pairing.
  • Ensure that you are pairing to a 2.4GHz network

If this doesn't initially work, try connecting your phone directly to the Canvas Wifi (it will show up as Canvas xx:xx:xx in your Wifi settings in your phone) and then continue the setup.

You can also open the Nanoleaf application and under the Menu>Devices> Remove your Canvas device and try the process again. Remember to always connect to your 2.4GHz network, ensure any possible firewalls are turned off. 

Setup code is incorrect

This is a reference in regards to your pairing code that you are inputing. To solve this please review your pairing code you have entered. Your pairing code is 8 digits long, all numeric. If you have made multiple attempts and still have an issue, please contact our support team.

Error Code Unknown

Generally, you will receive this error if the mobile device is unable to find the Canvas on the network. You can resolve this by doing the following:

  • Power cycle the Canvas (unplug from the wall or unplug the Power supply(s) from the panels
  • Restart the phone
  • Input the Pairing code once again

Sometimes this error can occur if you're using a public internet at Work, University/College, or an apartment Wifi - since they could have many restrictions. Check out the article on setting up on a these networks here for best practices.

Accessory is Not Connected

This typically occurs if there are changes that are made to your network. This is usually accompanied by a 4s on/4s off flashing of the Power button LED. To resolve this:

  1. Perform a soft reset on the Canvas (hold the power and + button for 10 seconds until the button LEDs start flashing)
  2. Delete the Canvas from the App
  3. Add a new device follow the original setup steps

If the issue continues to persist consistently, this suggests that the Light Panels are not being discovered on the local network. Usually configuring some settings on the router can solve this. In particular, check for the following settings:

  • UPnP (enabled)
  • Multicast (enabled)
  • IGMP Snooping (enabled)
  • Client/AP Isolation (disabled)

One other option to test relies on the Wifi channel the router is using. Most routers will default to auto-select the optimal channel, which usually works well. However, with some models, this can cause issues in how the router communicates with your Light Panels. Selecting a fixed Wifi channel can help to mitigate this unreachability. The recommended channels are 1, 6 or 11.

If you are still having issues, check with your Internet Service Provider. 

Wanyu Bradley

Troubleshooting: iOS App Errors

On iOS, there are a few error messages that might appear during or after the setup process. The list below, addresses the most common error message and troubleshooting steps.

The pairing code that was submitted through the app is incorrect. Please make sure to input the 8 digit pairing code correctly. If you input the pairing code correctly or scanned the code and still receive this error message, please contact us.

An unexpected error occurred

This error message appears if you are trying to setup the Canvas Squares or the Light Panels to a public WiFi such as at a school, dorm, work or at an apartment WiFi. These enterprise routers oftentimes have different security settings than those on standard home routers. Connecting to these networks may require additional assistance from an IT professional to configure. Check out our article on setting up on public WiFi networks for more information.

Network Configuration update

Deleting the existing pairing information by deleting the device from the app and performing a soft reset on the controller will resolve this. In order to delete the device from the Nanoleaf app you have to navigate to More > My Devices > Gear icon > Delete. Hold the Power button on the Canvas Square controller for 10 sec. On the Light Panels this can be done by holding the 2 buttons on the controller for about 10 sec. Once the LED on the controller begins to flash, release the buttons.

Accessory is Unreachable/ Accessory Not Connected

An unreachability can have various reasons, but this is typically an issue with connectivity particularly after switching WiFi Networks. Steps to take:

  1. Make sure the Panels are on the same local as your device
  2. Power cycle the Panels
  3. Turn the WiFi off and on on your device
  4. Power cycle your router

If the issue continues to persist, this suggests that the Light Panels are not being discovered on the local network. Usually configuring some settings on the router can solve this. In particular, check for the following settings:

  • UPnP (enabled)
  • Multicast (enabled)
  • IGMP Snooping (enabled)
  • Client/AP Isolation (disabled)

One other option to test relies on the WiFi channel the router is using. Most routers will default to auto-select the optimal channel, which usually works well. However, with some models, this can cause issues in how the router communicates with your Light Panels. Selecting a fixed WiFi channel can help to mitigate this unreachability. The recommended channels are 1, 6 or 11.

If you are still having issues, check with your Internet Service Provider. 

Wanyu Bradley

What do the Canvas buttons do?

The Control Square for your Nanoleaf Canvas features 6 LED backlit buttons that perform a variety of functions. These are as follows:

Simple Button Actions

Button

User Input

Result

Power

Single press

Toggle panel power

Brightness Up (+)

Single Press

Increases brightness by 10% increments.

(NoteHolding the button for >1s will increase brightness in 30% increments.)

Brightness Down (-)

Single Press

Decreases brightness by 10% increments.

(NoteHolding the button for >1s will decrease brightness in 30% increments.)

Select Color (>) 

Single press

Triggers Color Scenes.

(Note: Pressing the button >1 will cycle through saved Rhythm Scenes.)

Select Random (Shuffle)

Single press

Randomly chooses a scene to play 

Select Rhythm

Single Press

Triggers Rhythm mode

(Note: Pressing the button >1 will cycle through saved Rhythm Scenes.)


For more advanced buttons, see the table below:

Advanced Button Actions

Button

Input

Result

Select Colour (>)

Hold for 3s

If the currently shown scene is not in the favourites list then add it. Flash panels white to indicate that the scene was saved. This is most useful when shuffling through Random Scenes

Select Colour (>)

and

Brightness Down

Hold for 3s

If the currently shown scene is in the saved list then remove it. Flash panels red to confirm.

Shuffle

Hold for 3s

Return to last randomly selected scene (history of 5 scenes). Flash LED once. If the user is at the end of their history, flash panels yellow for 0.5s once

Brightness Up

Brightness Down

Single press together

Cycle through white modes: 2700K, 4000K, 5000K. This should remember the last known state for “white” so you can switch back and forth between a Scene and White without having to toggle multiple times.

Brightness Up

Brightness Down

Hold together for 5s

Enables/disables heat map mode to help user place power supplies. Any scene, colour, or power change from any source will exit this mode.


Administrative Button Actions

Button

Input

Result

Power

Hold for 3s

Enable API pairing and Remote Pairing

Power

Brightness Down

Hold for 10s

Soft reset the control Square (deletes Wifi and Pairing information)

Power

Brightness Down

Hold buttons while plugging into power

Factory Reset of the Control Square (resets to factory settings)

Power

Rhythm Select

Single press together

Enables Hotspot mode
Wanyu Bradley

How do I enable Hotspot Mode on the Canvas?

By activating the hotspot mode on the Canvas, the Canvas will begin to broadcast its own wifi, but with no internet connection. 

  1. Press and hold the rhythm as well as the power for 30 seconds.
  2. All 6 buttons on the Canvas will begin to flash 5 times, indicating that the hotspot mode has been activated and is being broadcasted. 
  3. To proceed the pairing process, navigate to the wifi settings on your device. The Canvas wifi will appear in the list of available networks as Canvas ####. 
  4. Tap on the Canvas to connect to its wifi 
  5. Open the Nanoleaf app > open the menu > navigate to device> tap on plus icon to add new device> select Canvas.
  6. You will find the Canvas as available device listed with a magnifying glass. Selecting the Canvas will prompt you to input the pairing code of the Canvas and hit done.
  7. A confirmation page “Set Up Complete” will appear on the screen, pressing “Next” at the top right corner leads to the “Name Your Device” page.
  8. You can rename the Canvas and hit “Next” at the top right corner which will lead the you to the last set up page “Configure Your Device” to match the orientation of the Canvas configuration on screen with the users installation.
  9. By clicking “Next” the pairing process has been completed.
Wanyu Bradley

Expanding Your Canvas System with Multiple Power Supplies

When setting up a layout that requires multiple power supplies, it’s important to understand that power flows through the system in a way that is entirely dependent on how you connect your panels to each other.

Your Canvas system is designed to protect against all conditions that may lead to failure, including electrical problems and potential safety hazards. The system is designed to detect where you have placed panels and power supplies, and then optimise the overall system to protect the weakest link.

To simplify setup, we strongly recommend using either 25W power supplies or 75W power supplies. This reduces the likelihood of inadvertently placing power supplies in a manner that provides for poor system performance.

The Power Diagnostic tool in the app will help you progressively place or optimise the locations of your supplies, although they work best when you are using a single type of power supply.

If you do not have the option of using a single power supply type, try the following strategies to optimise your placement:

  • Please note, you are not able to use the 75W and 25W in the same setup due to Voltage difference
  • Your setup can be only be comprised of 25W or 75W power supply based on the number of panels
  • The 25W supply supports 25 panels per PSU and the 75W supports 75 panels per PSU so pending the number of panels you might require more than one PSU
  • Roughly separate the layout depending on the total power of 25W versus the total power of 75W suppliesDistribute all other supplies as evenly as possible

A good rule of thumb is to plan for each panel to draw 1 watt of power (this is the maximum electricity each panel could draw, though will likely be lower in practice).

Wanyu Bradley

Setting up with Larger Layouts (More than 25 panels)

For those who are trying to fill your entire wall with squares, here are some tips which will allow you to best set up your Nanoleaf Canvas. Plan for enough power supplies to deliver 1W of power to each square (this is the maximum draw). The power supply in the standard retail smarter kit is 25W, and a 75W version is available as an accessory.

Start with a Plan

Start by determining the design you would like for your Nanoleaf Canvas. Once this shape is complete, you will need to consider how to connect each square to the next. We recommend placing a row of squares at the bottom of the layout as an "anchor" and then add squares building up from the anchor. This not only allows the squares to distribute power more evenly, but the power supplies will likely be clustered around the bottom of the system. Implementing an “S” shaped internal configuration for power distribution is the least efficient, and will likely degrade system performance when you have a high number of squares.

Use the Heat Map

The heat map tool will help to determine where to place the power supplies on your layout. The heat map is designed to visually identify the best positions to connect power supplies in your layout. Initiate this mode by selecting the Brightness Up and Brightness Down buttons (+ and -) for 5 seconds. Squares which are blue indicate the optimal position to place the power supply. If that square is not accessible connect the power supply to the brightest white squares. Dark panels indicate a suboptimal placement position for power supplies.

Add More Squares

After implementing this with the first 50 squares, add the next 25 squares to the system. Once placed in your system, add the next power supply following the first two steps above. Standalone power supply units are available on Aurazoe.

Wanyu Bradley

Lost Pairing Code

If you lose the 8-digit pairing code and need to re-pair your device, the code can be retrieved in the following ways:

  • On the cover of the User Guide booklet.
  • On the back of the Control Square.
  • NFC scanning the Control Square.

On the cover of the User Guide booklet, as well as on the back of the Control Square, one will find a sticker that lists the pertinent information related to the set of squares. This includes the 8-digit pairing code.

In order to use NFC to retrieve the pairing code, NFC must first be enabled on your mobile device and the Nanoleaf App must be in pairing mode. To scan the code, simply hold the mobile device close to the Control Square, moving it slowly across the surface of the square.

Note:  Apple models older than the iPhone 6, iPad Pro 9.7, iPad Air 2, and iPad Mini 3 do not have NFC capability. The availability of NFC on Android devices will depend on the manufacturer and model. Please refer to the user manual for the Android device to verify if NFC is available.

Wanyu Bradley

How to Use Multiple Control Squares in the Same Layout

If your Nanoleaf Canvas system has more than one Control Square, it is important to place one of them into Passive Mode so that squares are taking commands from only one of the Control Squares.

Setting your additional Control Squares into Passive Mode will cause it to behave like a normal square and receive commands from the active Control Square. This eliminates the chance of multiple Control Squares interfering with each other once connected to the same system.

Please enter this button sequence to enable Passive Mode on a Control Square: 

(Power →  + → -) x 3

Press the power button, then the + button, then the - button on the Control Square and repeat this sequence three times. 

Wanyu Bradley

Layout Assistant

We generally recommend using the Layout Assistant to test and configure your Nanoleaf Canvas before mounting the squares on the wall or ceiling.

Once the Canvas squares have been successfully paired with the Nanoleaf App, the Layout Assistant becomes available.

Besides verifying your current layout, you can rotate the orientation of your layout in the app by placing two fingertips on the screen and rotating clockwise or counterclockwise to determine the final position.

The Layout Assistant can also be used to create different shapes by moving the squares around or adding additional Canvas squares to the layout.

Using the augmented reality feature of the Layout Assistant, you can preview the design that you've created in front of your eyes with your mobile device's camera.

intergrations-apple-home-badge
intergrations-google-home-badge
intergrations-alexa-badge_1
intergrations-ifttt-badge